How do you properly install a horse fence to ensure safety and durability?
Jun 17, 2025
Installing a safe and durable horse fence requires careful planning, quality materials, and meticulous execution. Here's a step-by-step guide focusing on key principles:
Core Principles:
Safety First: Eliminate sharp edges, pinch points, and gaps large enough for hooves/heads. Ensure high visibility.
Horse Psychology: Horses lean, scratch, run into fences, and test boundaries. Fences must withstand impact and discouragement without causing injury.
Durability: Resist weather, chewing, kicking, and leaning. Minimize maintenance.
Visibility: Horses must see the fence clearly to avoid running into it.
Recommended Materials: (Avoid barbed wire, high-tensile non-electric wire, or large-mesh stock panels)
Wood Rails: Classic, visible, strong. Use treated lumber (ensure horse-safe treatment like UC4B or ACQ). Requires maintenance.
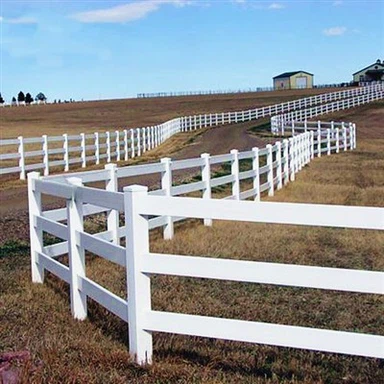
PVC/Vinyl: Low maintenance, visible, durable. Requires UV-stabilized quality and sturdy posts. Can break if impacted hard.
Electric Tape/Rope/Wire: Highly effective deterrent when properly installed. Excellent for boundaries and internal divisions. Requires robust energizer and multiple ground rods.
Mesh/Woven Wire: (Specifically designed for horses - small openings at the bottom, larger toward the top - like "no-climb" or "vee-mesh"). Prevent legs/hooves from going through. Must be stretched very tightly.
Posts: Wood (treated), steel T-posts (ALWAYS use safety caps), or composite. Corner/end posts must be significantly larger and deeper-set than line posts.
Proper Installation Steps:
Planning & Layout:
Survey: Mark your exact property lines. Determine fence path, noting slopes, wet areas, gates, water sources, shelters, and potential hazards (trees, rocks).
Choose Type: Select fencing material(s) based on budget, aesthetics, and primary purpose (perimeter, paddock, stallion fence).
Materials Calculation: Precisely measure the perimeter. Calculate:
Number of corner/end/gate posts (heaviest duty).
Number of line posts (spaced 8-12 ft apart depending on material).
Linear feet of fencing material (add 10% for waste/sag).
Number of fasteners (nails, screws, clips).
For Electric: Energizer size, wire/tape, insulators, ground rods (minimum three 6-8 ft rods).
Permits: Check local zoning/building codes for requirements.
Setting Posts (The Foundation of Durability):
Dig Holes: Use an auger or post hole digger.
Depth: Critical! Minimum 1/3 of post length above ground plus 6 inches for gravel base. For a 5ft high fence, corner posts need at least 3.5 ft depth (often 4ft); line posts need 2.5-3 ft.
Diameter: Hole should be 3x the post width.
Base: Add 6 inches of gravel for drainage to prevent rot/heaving.
Set Corner/End Posts: These bear ALL tension.
Use largest diameter posts (6-8 inch wood or heavy steel).
Set in concrete (fast-setting) for maximum strength. Tamp soil firmly around concrete. Ensure posts are perfectly plumb.
Set Line Posts: Can often be set in tamped soil/gravel mix (especially in well-drained soil), but concrete provides best longevity. Space consistently (8-12 ft).
Bracing Corners/Ends: MANDATORY. Use robust H-braces or diagonal braces. Posts must lean slightly away from the pull direction before tensioning. Brace assemblies must be rigid and anchored.